Quick Start Guide
Get EmailEngine up and running in 10 minutes. This guide walks you through installing EmailEngine, adding your first email account, sending an email, and receiving webhook notifications.
Step 1: Install EmailEngine
Option A: Download Binary (Quickest)
# Download latest release
$ wget https://go.emailengine.app/emailengine.tar.gz
$ tar xzf emailengine.tar.gz
$ chmod +x emailengine

# Start EmailEngine (default Redis database is 8)
$ ./emailengine --dbs.redis="redis://127.0.0.1:6379/8"
Option B: Using Docker
# Pull the latest version
$ docker pull postalsys/emailengine:v2

# Run EmailEngine
$ docker run -p 3000:3000 \
  --env EENGINE_REDIS="redis://host.docker.internal:6379/8" \
  postalsys/emailengine:v2
EmailEngine will start on http://localhost:3000
For production deployments, you must configure EENGINE_SECRET to encrypt stored credentials. Without this setting, account passwords and OAuth tokens are stored unencrypted in Redis.
Generate the secret once, store it permanently, and pass the same value to EmailEngine on every start:
# Generate the secret once and persist it
echo "EENGINE_SECRET=$(openssl rand -hex 32)" >> .env

# Pass the persisted value to the container on every start
docker run -p 3000:3000 \
  --env-file .env \
  --env EENGINE_REDIS="redis://host.docker.internal:6379/8" \
  postalsys/emailengine:v2
See Credential Security for details on how EmailEngine protects your data.
Step 2: Access the Web Interface
- Open your browser and navigate to http://localhost:3000
- On first startup, you'll be prompted to create an admin account
- Set a secure password for the web admin UI
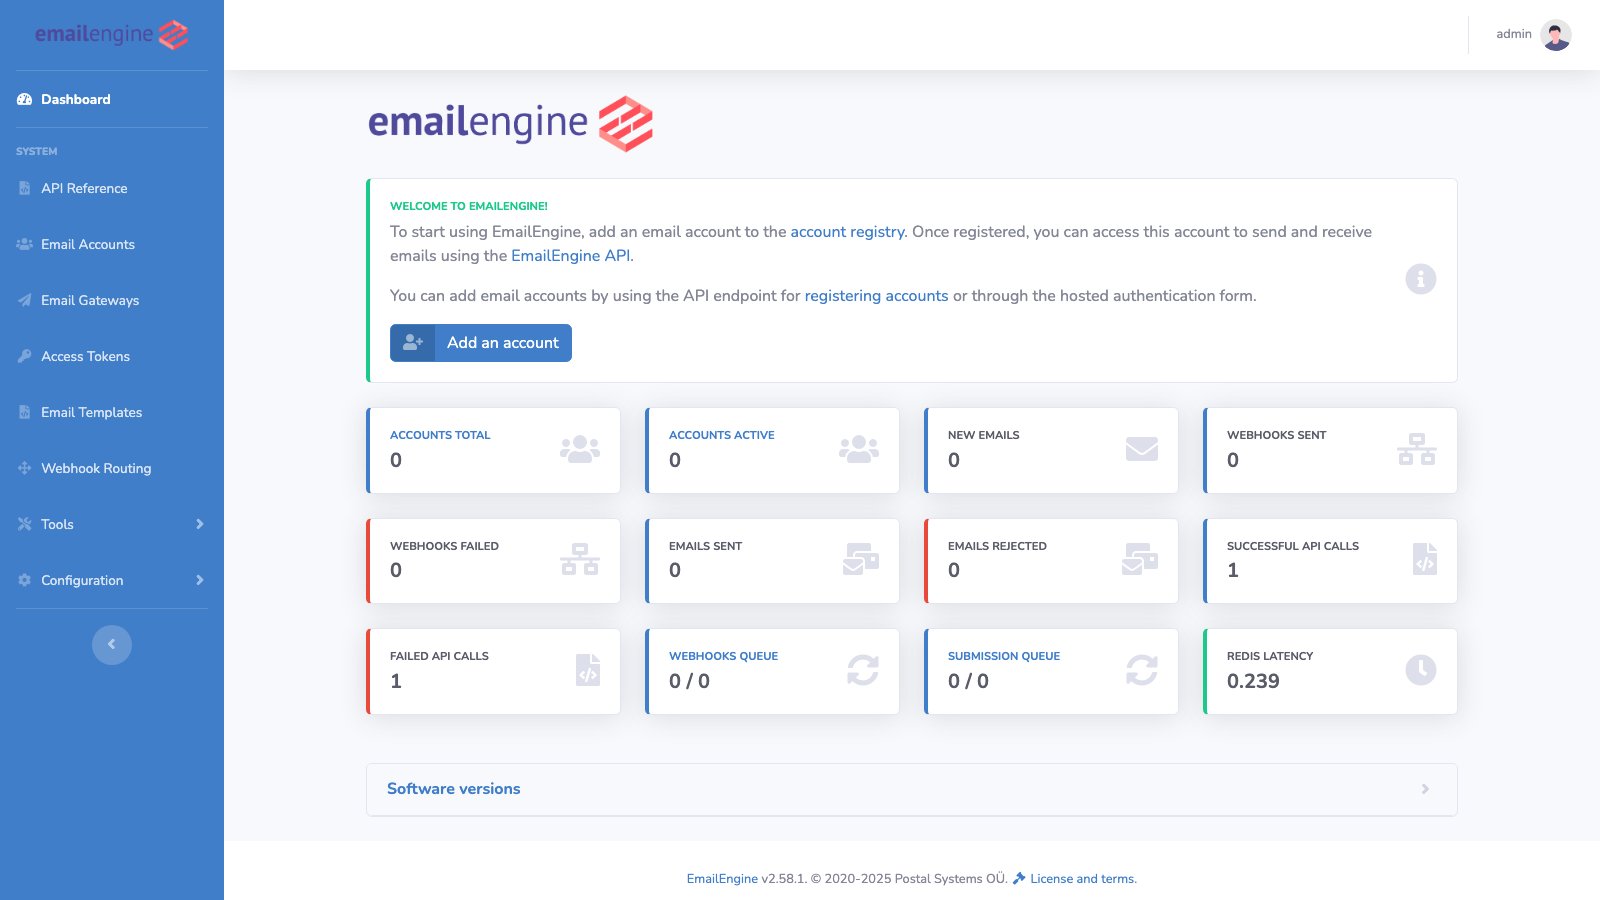 EmailEngine dashboard showing system statistics and account overview
Step 3: Generate an API Access Token
You need an access token to authenticate API requests.
Via CLI (Recommended):
Use the EmailEngine CLI to generate a full-access token:
$ emailengine tokens issue -d "Development" -s "*" --dbs.redis="redis://127.0.0.1:6379/8"
8bf639ec7c051c3963498c6757b6813bd331afeb677886d4473190fae66c9fab
Save your token as an environment variable:
$ export EMAILENGINE_TOKEN="8bf639ec7c051c3963498c6757b6813bd331afeb677886d4473190fae66c9fab"
Benefits of CLI tokens:
- Full system access (all scopes)
- Can access system-wide endpoints (settings, metrics, etc.)
- Not bound to specific email accounts
- Recommended for development and production API access
Via Web Interface:
- Navigate to Access Tokens in the sidebar menu
- Click Create new
- Provide a name (e.g., "Development")
- Select scopes (use
*for full access) - Click Generate a token
- Copy the token immediately - it's shown only once
The Create Access Token API generates account-scoped tokens that are limited to specific email accounts. For full system access, use the CLI or web interface.
Step 4: Add Your First Email Account
EmailEngine supports multiple account types. Choose the method that fits your needs:
Option A: Hosted Authentication Form (Recommended)
The easiest way to add accounts is using EmailEngine's built-in hosted authentication form. EmailEngine handles the entire OAuth2 flow for you.
Benefits:
- No need to obtain OAuth2 tokens manually
- EmailEngine manages token refresh automatically
- Works with Gmail, Outlook, and other OAuth2 providers
- User-friendly authentication experience
How to use:
-
Your application generates an authentication form URL via the API:
curl -XPOST "http://127.0.0.1:3000/v1/authentication/form" \
  -H "Authorization: Bearer ${EMAILENGINE_TOKEN}" \
  -H "Content-Type: application/json" \
  -d '{
    "account": "user123",
    "redirectUrl": "https://your-app.com/callback"
}' -
Redirect the user's browser to the generated form URL
-
User chooses authentication method:
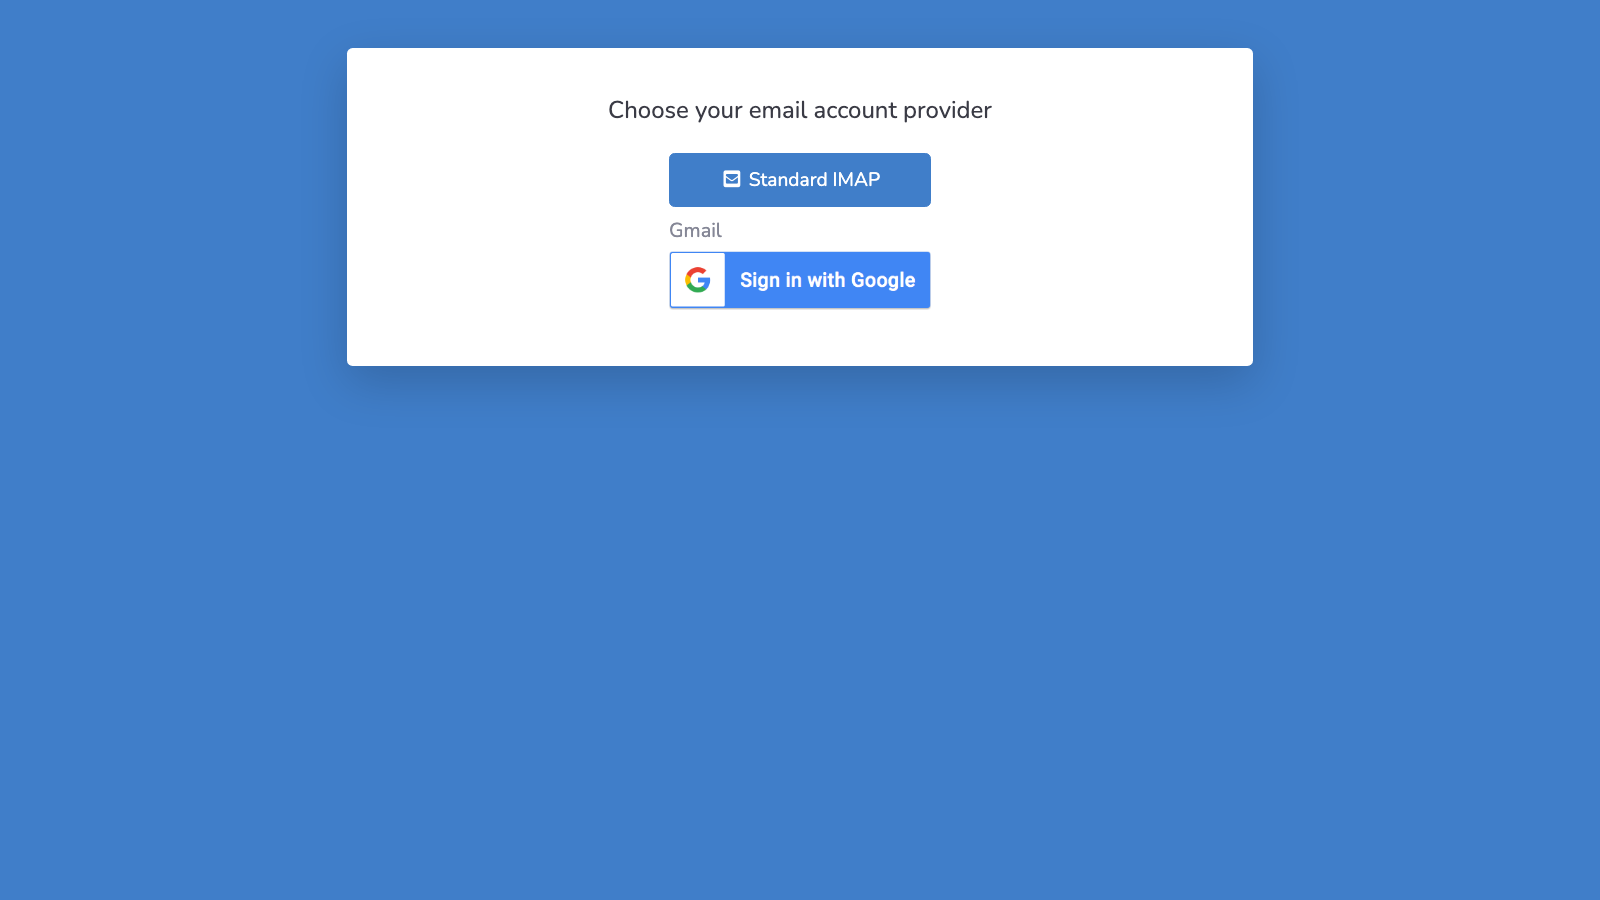 Account type selection page showing OAuth2 provider buttons and standard IMAP option
- OAuth2 Provider (Gmail/Outlook): Clicks provider button, follows OAuth2 flow
- IMAP/SMTP: Enters email/password, EmailEngine auto-detects server settings
-
After authentication, user is redirected back to your
redirectUrl -
EmailEngine handles token management and maintains the connection automatically
OAuth2 provider buttons (Gmail, Outlook) only appear if OAuth2 apps are configured in EmailEngine. Set these up via Configuration → OAuth2 Apps in the web interface, or use the OAuth2 Apps API. See Gmail OAuth2 Setup and Outlook OAuth2 Setup for detailed configuration guides.
For testing during development, admins can use the web interface: navigate to Email Accounts → Add an account. This is a convenience wrapper for the same authentication form.
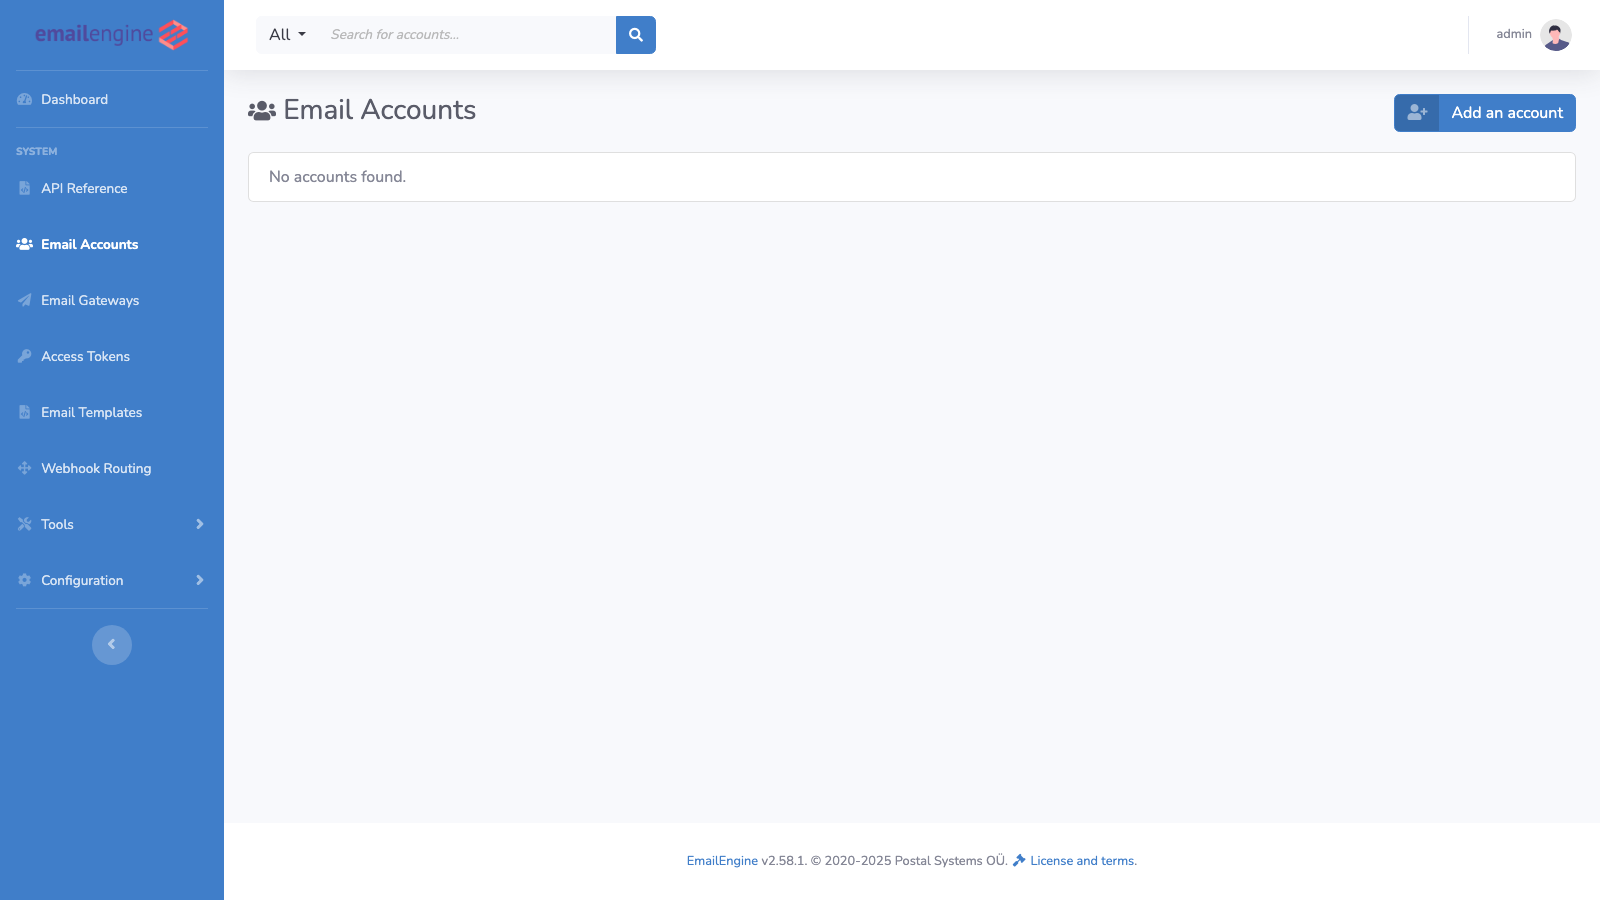 Email Accounts page showing empty account list with "Add an account" button
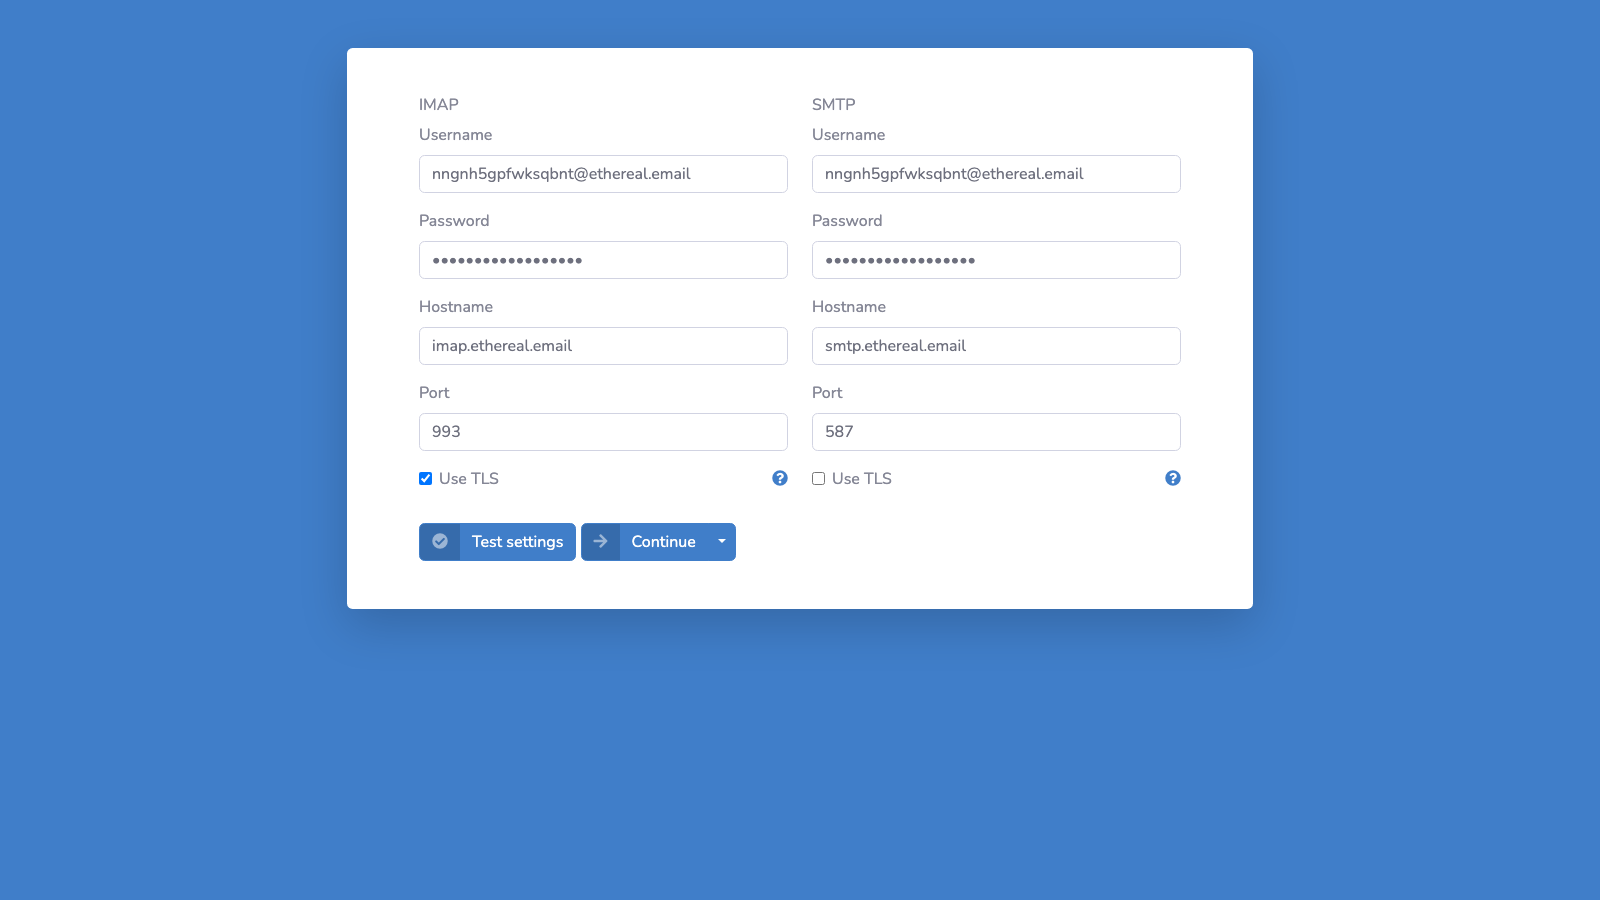 Auto-detected IMAP/SMTP configuration showing server settings, ports, and TLS options
When to use the hosted form:
- Quick account setup during development
- End-user account authentication in your application
- When you don't need programmatic control over OAuth2 tokens
You can redirect users to the hosted authentication form from your application. The form will redirect users to the OAuth2 provider's permission page (which must open in a main window, not an iframe due to security restrictions). After authentication, users are redirected back to your application. See the Authentication Form API for details.
Option B: API with OAuth2 Tokens (Advanced)
For programmatic control or special requirements, register accounts directly via API with OAuth2 tokens you've obtained.
When to use direct API:
- Automated account provisioning
- Service account authentication
- Custom OAuth2 flows
- When you need to manage tokens yourself
Gmail Example:
Prerequisites: You need to set up OAuth2 credentials in Google Cloud Console. See detailed guide →
$ curl -XPOST "http://127.0.0.1:3000/v1/account" \
  -H "Authorization: Bearer ${EMAILENGINE_TOKEN}" \
  -H "Content-Type: application/json" \
  -d '{
    "account": "my-gmail",
    "name": "Your Name",
    "email": "you@gmail.com",
    "oauth2": {
      "provider": "AAABlf_0iLgAAAAQ",
      "refreshToken": "1//0...",
      "auth": {
        "user": "you@gmail.com"
      }
    }
  }'
The provider value should be your OAuth2 application ID from EmailEngine, which is a base64url encoded string like AAABlf_0iLgAAAAQ. Find this in Configuration → OAuth2 Apps.
Outlook Example:
Prerequisites: You need to register an app in Azure AD. See detailed guide →
$ curl -XPOST "http://127.0.0.1:3000/v1/account" \
  -H "Authorization: Bearer ${EMAILENGINE_TOKEN}" \
  -H "Content-Type: application/json" \
  -d '{
    "account": "my-outlook",
    "name": "Your Name",
    "email": "you@outlook.com",
    "oauth2": {
      "provider": "AAABlf_0iLgAAAAQ",
      "refreshToken": "M.C546_...",
      "auth": {
        "user": "you@outlook.com"
      }
    }
  }'
Option C: Generic IMAP/SMTP (Any provider)
This works with any email provider that supports IMAP and SMTP:
$ curl -XPOST "http://127.0.0.1:3000/v1/account" \
  -H "Authorization: Bearer ${EMAILENGINE_TOKEN}" \
  -H "Content-Type: application/json" \
  -d '{
    "account": "my-account",
    "name": "Your Name",
    "email": "you@example.com",
    "imap": {
      "host": "imap.example.com",
      "port": 993,
      "secure": true,
      "auth": {
        "user": "you@example.com",
        "pass": "your-password"
      }
    },
    "smtp": {
      "host": "smtp.example.com",
      "port": 465,
      "secure": true,
      "auth": {
        "user": "you@example.com",
        "pass": "your-password"
      }
    }
  }'
Common Provider Settings
| Provider | IMAP Host | IMAP Port | SMTP Host | SMTP Port |
|---|---|---|---|---|
| Gmail | imap.gmail.com | 993 | smtp.gmail.com | 465 |
| Outlook.com | outlook.office365.com | 993 | smtp.office365.com | 587 |
| Yahoo | imap.mail.yahoo.com | 993 | smtp.mail.yahoo.com | 465 |
| Fastmail | imap.fastmail.com | 993 | smtp.fastmail.com | 465 |
Response:
{
  "account": "my-account",
  "state": "new"
}
Step 5: Wait for Initial Sync
EmailEngine performs an initial sync of your mailbox before it's ready to use.
Option A: Using Webhooks (Recommended)
Once the account completes its initial sync, EmailEngine automatically sends an accountInitialized webhook event:
{
  "serviceUrl": "https://emailengine.example.com",
  "event": "accountInitialized",
  "account": "my-account",
  "date": "2025-01-15T10:23:45.678Z",
  "data": {
    "initialized": true
  }
}
Benefits:
- No polling required
- Instant notification when account is ready
- Efficient for production applications
Option B: Polling Account Status
Alternatively, poll the get account API until state shows "connected":
# Check account status
$ curl "http://127.0.0.1:3000/v1/account/my-account" \
  -H "Authorization: Bearer ${EMAILENGINE_TOKEN}"
Response when ready:
{
  "account": "my-account",
  "name": "Your Name",
  "email": "you@example.com",
  "state": "connected",
  "lastError": null
}
Key fields to check:
state: Should be"connected"(other values:"init","syncing","connecting","authenticationError","connectError","unset","disconnected")lastError: Should benullif no errors occurred
Initial Sync Duration
Sync time depends on:
- Number of mailbox folders - More folders take longer to scan
- Number of messages - Each message needs to be indexed
- Indexer type - Fast indexer (detects only new messages) or Full indexer (detects new, changed, and deleted messages; default)
Step 6: Send Your First Email
Once the account is connected, send a test email using the submit API:
$ curl -XPOST "http://127.0.0.1:3000/v1/account/my-account/submit" \
  -H "Authorization: Bearer ${EMAILENGINE_TOKEN}" \
  -H "Content-Type: application/json" \
  -d '{
    "to": [{
      "name": "Test Recipient",
      "address": "recipient@example.com"
    }],
    "subject": "Test email from EmailEngine",
    "text": "Hello! This is my first email sent through EmailEngine.",
    "html": "<p>Hello! This is my first email sent through <strong>EmailEngine</strong>.</p>"
  }'
Response:
{
  "response": "Queued for delivery",
  "messageId": "<unique-id@example.com>",
  "sendAt": "2025-01-15T10:25:30.123Z",
  "queueId": "abc123def456"
}
The email is now queued for delivery. EmailEngine will:
- Submit it to the SMTP server
- Retry automatically if delivery fails
- Send webhooks for delivery status
Step 7: Set Up Webhooks
Webhooks notify your application about email events in real-time.
Configure Webhook URL
Via Web Interface:
- Go to Settings → Webhooks
- Enter your webhook URL (e.g.,
https://your-app.com/webhooks) - Select events you want to receive
- Save settings
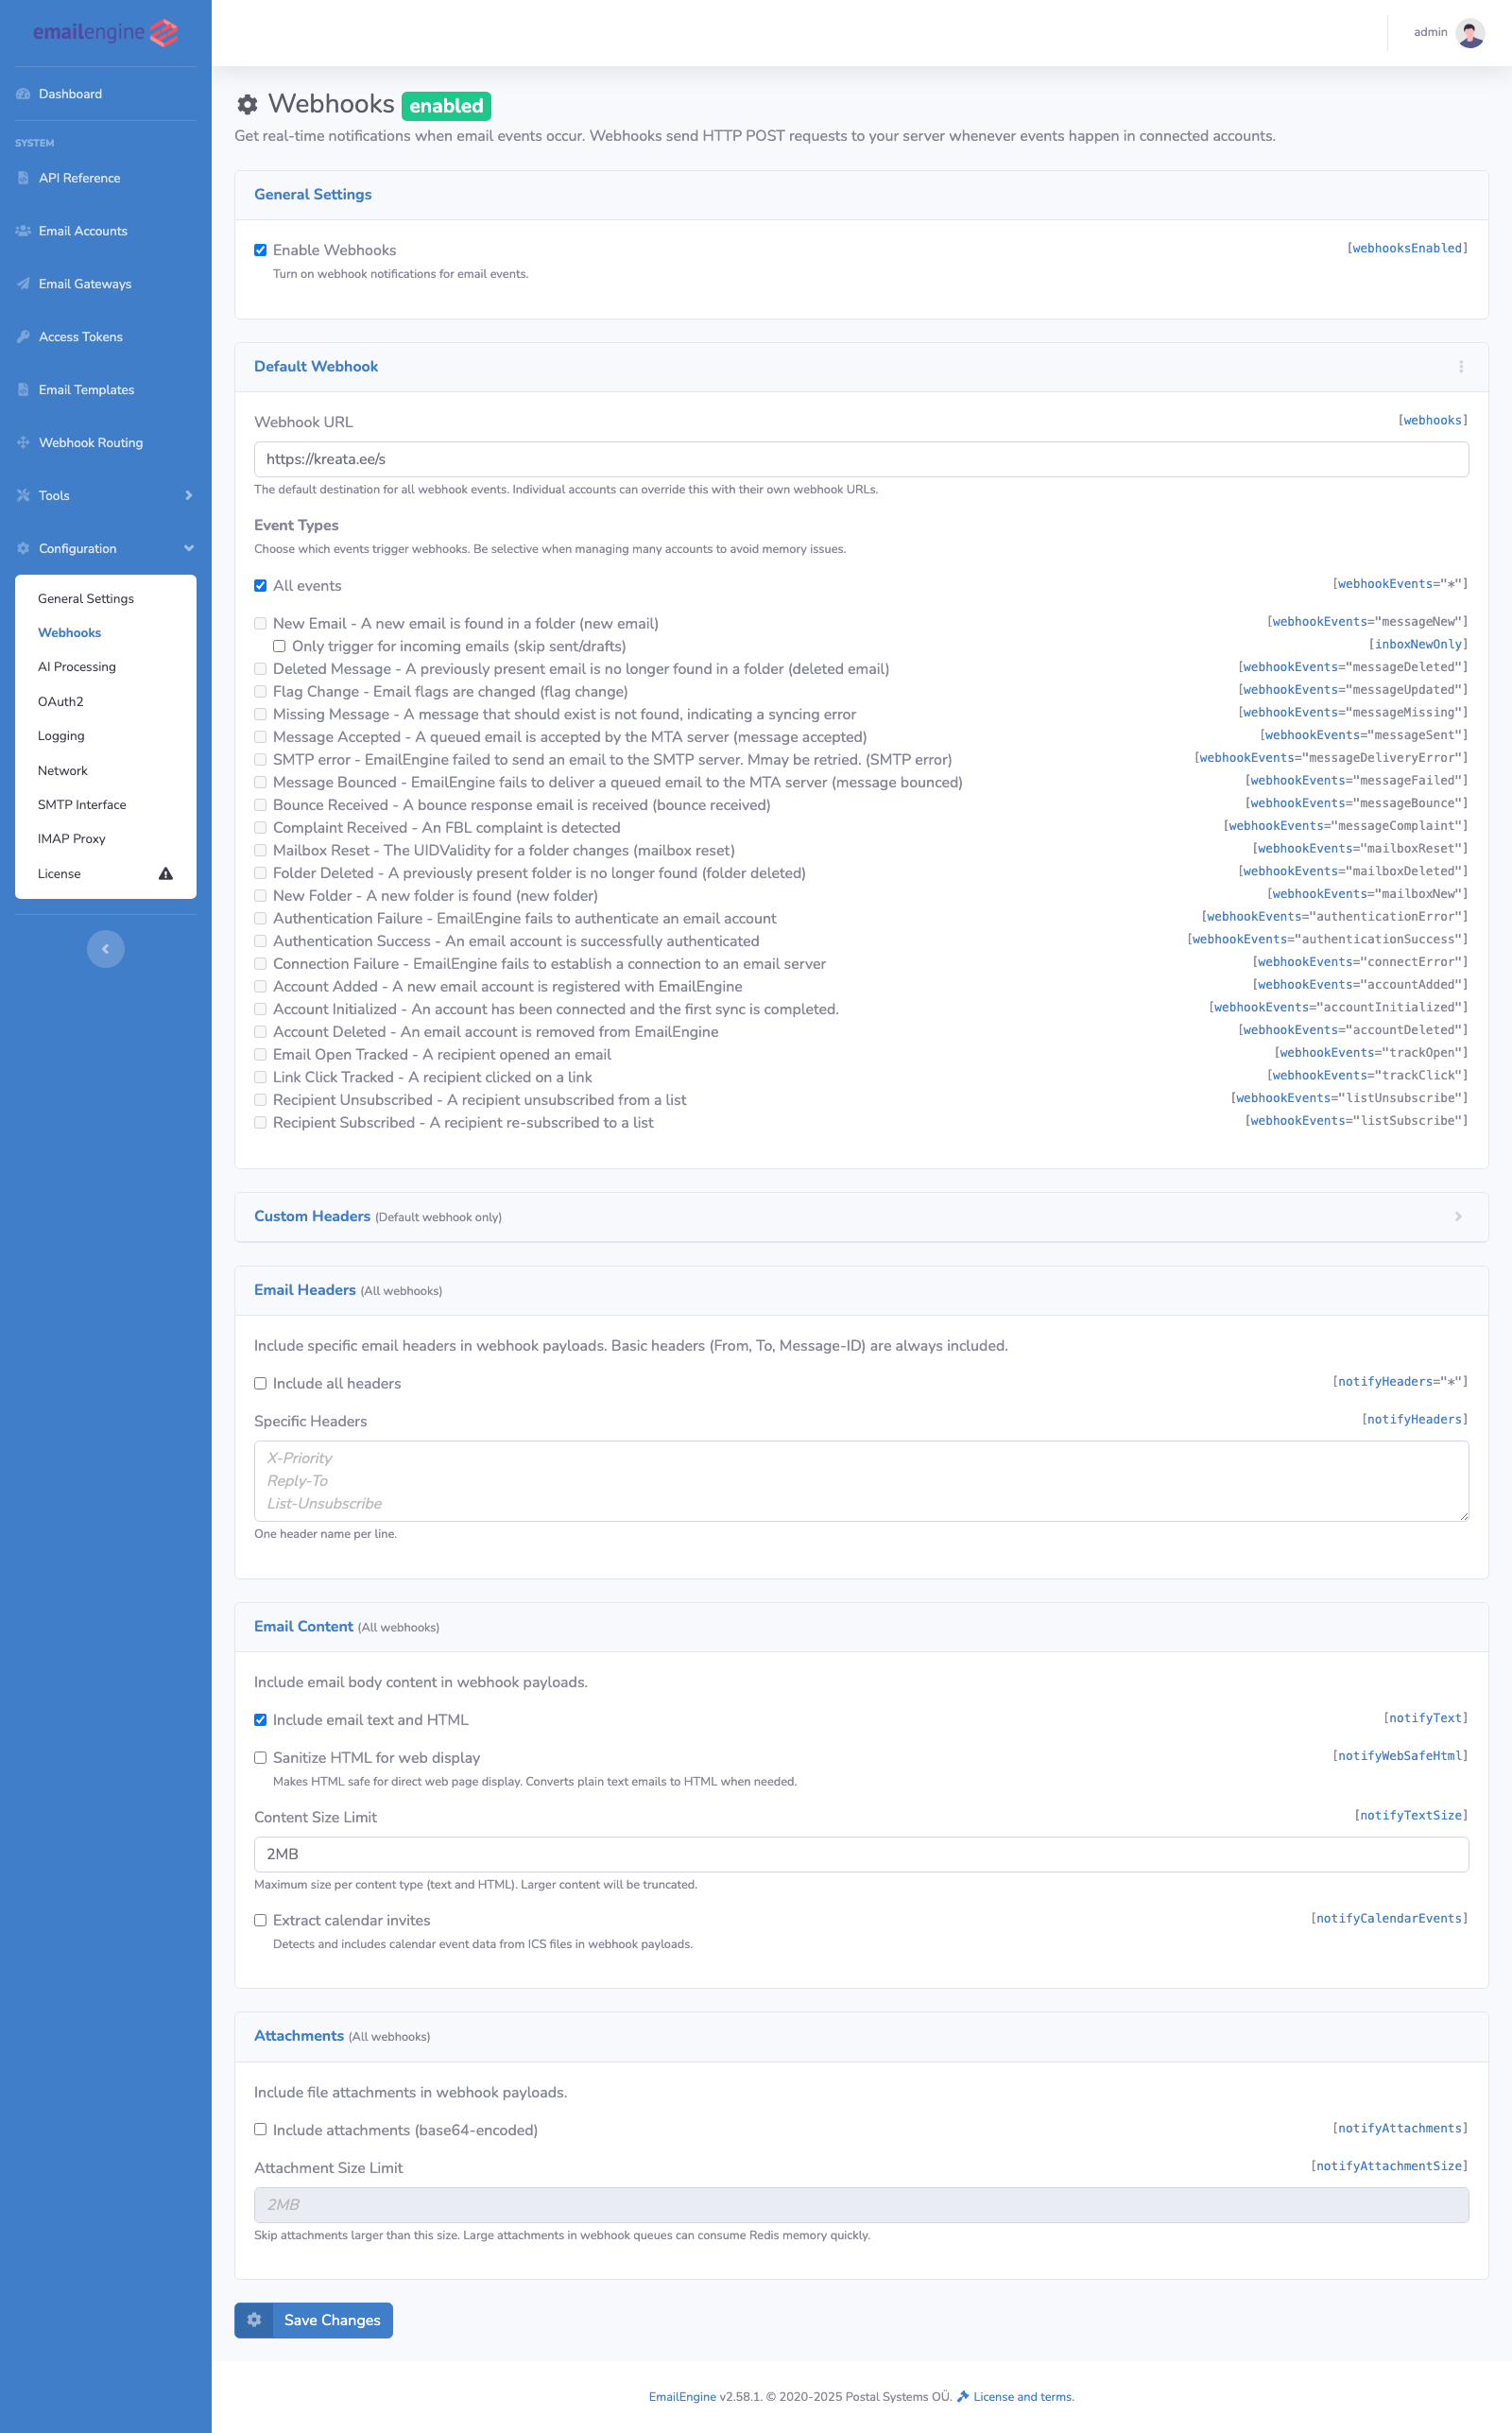 Webhooks configuration page in EmailEngine settings
Via API:
Use the update settings API:
$ curl -XPOST "http://127.0.0.1:3000/v1/settings" \
  -H "Authorization: Bearer ${EMAILENGINE_TOKEN}" \
  -H "Content-Type: application/json" \
  -d '{
    "webhooks": "https://your-app.com/webhooks"
  }'
Test Webhooks with Webhook.site
For testing, use webhook.site to see webhook payloads:
- Go to https://webhook.site - you'll get a unique URL
- Copy the URL (e.g.,
https://webhook.site/abc-123-def) - Set it as your webhook URL in EmailEngine
- Send a test email (Step 6)
- Check webhook.site to see the delivery notifications
Example Webhook Events
New Email Received:
{
  "account": "my-account",
  "event": "messageNew",
  "data": {
    "id": "AAAAAQAACnA",
    "uid": 1234,
    "subject": "Meeting tomorrow",
    "from": {
      "name": "John Doe",
      "address": "john@example.com"
    },
    "date": "2025-01-15T10:30:00.000Z",
    "intro": "Thanks for scheduling the meeting..."
  }
}
Email Sent Successfully:
{
  "account": "my-account",
  "event": "messageSent",
  "data": {
    "messageId": "<unique-id@example.com>",
    "queueId": "abc123def456",
    "response": "250 2.0.0 OK: queued as A1B2C3"
  }
}
Email Delivery Failed:
{
  "account": "my-account",
  "event": "messageDeliveryError",
  "data": {
    "queueId": "abc123def456",
    "messageId": "<unique-id@example.com>",
    "error": "Connection timeout",
    "job": {
      "attemptsMade": 1,
      "attempts": 10,
      "nextAttempt": "2025-01-15T10:35:00.000Z"
    }
  }
}
Step 8: List Incoming Messages
Retrieve messages from the mailbox using the list messages API:
$ curl "http://127.0.0.1:3000/v1/account/my-account/messages?path=INBOX&pageSize=10" \
  -H "Authorization: Bearer ${EMAILENGINE_TOKEN}"
Response:
{
  "total": 1234,
  "page": 0,
  "pages": 124,
  "messages": [
    {
      "id": "AAAAAQAACnA",
      "uid": 1234,
      "subject": "Meeting tomorrow",
      "from": {
        "name": "John Doe",
        "address": "john@example.com"
      },
      "date": "2025-01-15T10:30:00.000Z",
      "intro": "Thanks for scheduling...",
      "flags": ["\\Seen"],
      "labels": []
    }
  ]
}
Step 9: Read a Specific Message
Get full message content including body and attachments using the get message API:
$ curl "http://127.0.0.1:3000/v1/account/my-account/message/AAAAAQAACnA" \
  -H "Authorization: Bearer ${EMAILENGINE_TOKEN}"
Step 10: Search Messages
Search for messages matching specific criteria using the search messages API:
$ curl -XPOST "http://127.0.0.1:3000/v1/account/my-account/search" \
  -H "Authorization: Bearer ${EMAILENGINE_TOKEN}" \
  -H "Content-Type: application/json" \
  -d '{
    "search": {
      "from": "john@example.com",
      "subject": "meeting"
    }
  }'
Set Up OAuth2
- Gmail OAuth2 Setup - Complete guide with screenshots
- Outlook OAuth2 Setup - Azure AD configuration
- OAuth2 Token Management - Use tokens for other APIs
Production Deployment
- Docker Deployment - Production Docker setup
- Environment Variables - Configuration Reference
- Performance Tuning - Optimize for high volume
- Security Best Practices - Secure your deployment
Integration Examples
- CRM Integration - Complete architecture guide
- AI/ChatGPT Integration - Email summaries and analysis
- PHP Integration - Using the PHP library
Get Help
- Documentation - Complete guides and API reference
- Troubleshooting Guide - Common issues and solutions
- GitHub Issues - Report bugs
- Support - Get professional help
Common Provider-Specific Notes
Gmail
- Account passwords disabled: Gmail has completely disabled account password authentication
- App passwords required: Must enable 2FA and generate an app-specific password
- OAuth2 recommended: OAuth2 provides the best experience (automatic token refresh)
- OAuth2 verification: Public OAuth2 apps require verification if sending to many users
- Complete Gmail setup →
Outlook/Microsoft 365
- OAuth2 required: Password authentication is deprecated for personal accounts
- Azure AD setup: Requires app registration in Azure portal
- Permissions: Need both IMAP and SMTP permissions or use Graph API
- Complete Outlook setup →
Yahoo Mail
- App password required: Generate at account.yahoo.com
- IMAP/SMTP settings: Same as table above
- Rate limits: Yahoo has aggressive rate limiting
ProtonMail
- Bridge required: ProtonMail requires the ProtonMail Bridge app
- Local server: Bridge runs on localhost with custom ports
- Security: Bridge handles encryption/decryption